Easy DIY Cardboard Articulating Wings: Step-by-Step
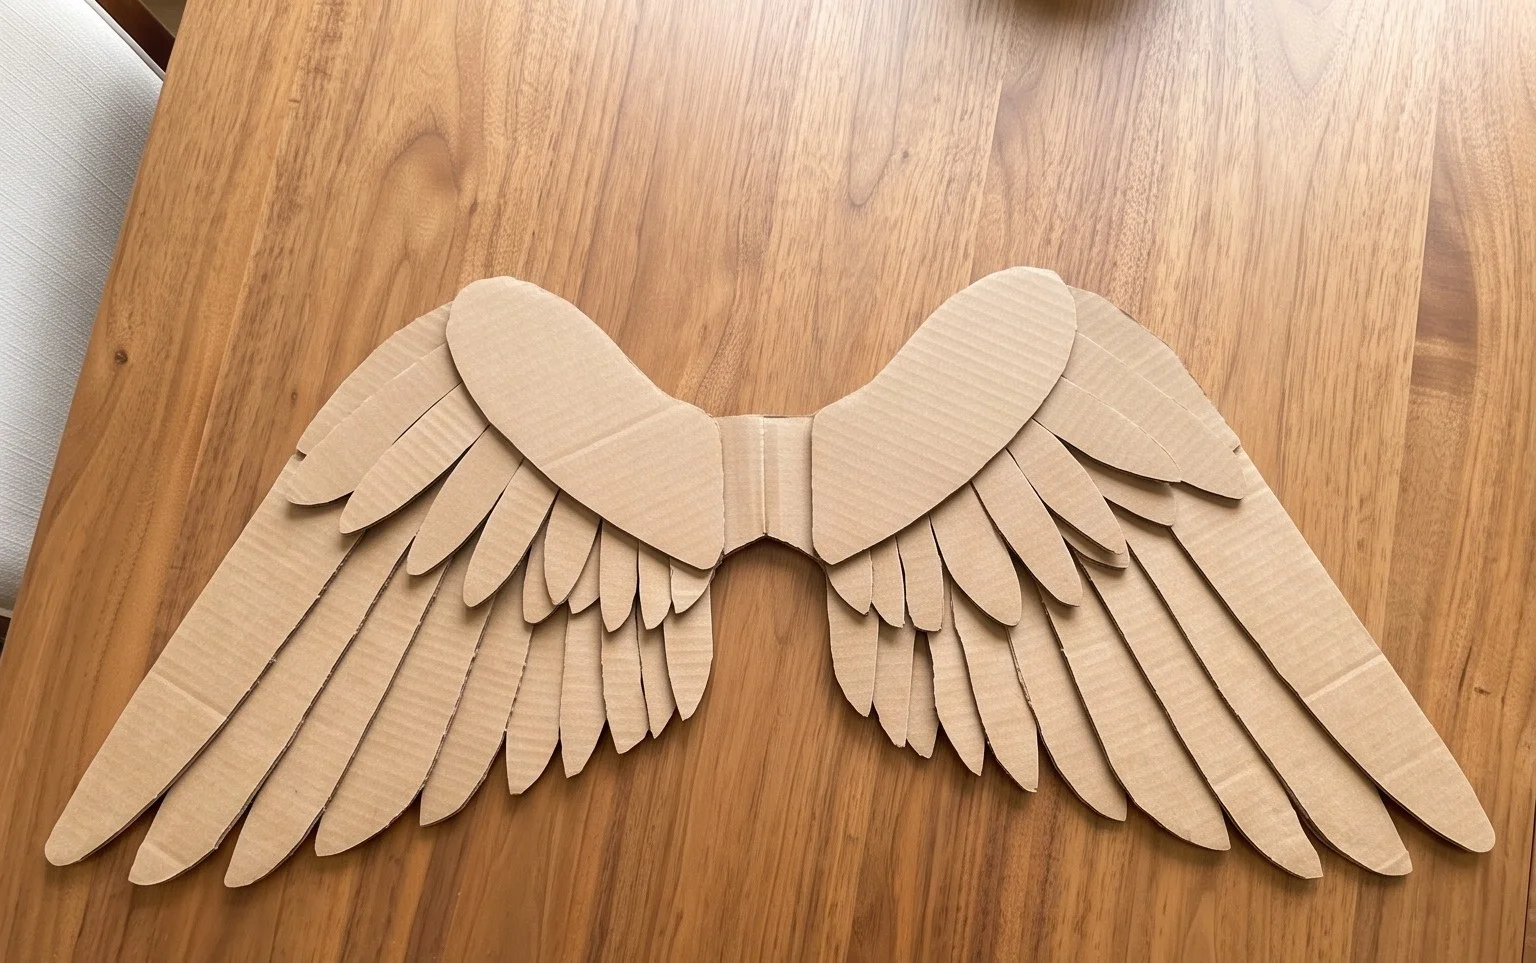
DIY cardboard articulating wings are about to take flight in your own home! Imagine creating a stunning pair of majestic, spread wings, ready to adorn your walls or even be worn for a touch of fantasy. These aren’t just flat decorations; they have beautiful joints that allow for a dynamic, lifelike pose. Perfect for crafty beginners and imaginative kids, this project is a fantastic way to spend an afternoon, roughly taking about 1-2 hours to complete. You’ll discover how to transform simple cardboard into a captivating piece of art, learning essential cutting, scoring, and assembly techniques. Get ready to unleash your inner artist and build something truly magical – let’s get crafting!
DIY Cardboard Articulating Wings: Bring Your Creations to Life!
Hello, fellow crafters and art enthusiasts! Today, we’re diving into a fun and rewarding project: creating your very own articulating cardboard wings. These aren’t just flat cutouts; they’re designed with clever folds to give them a sense of movement and dimension, making them perfect for costumes, wall art, or as the crowning glory for your imaginative creations. We’ll be using a technique that’s accessible to beginners, relying on simple folds to build complexity. Don’t worry if you’ve never done origami before; I’ll guide you through every step with clear, easy-to-follow instructions. Let’s get started on bringing these magnificent wings to life!
Choosing Your “Paper”: The Cardboard Canvas
When I say “paper” for this project, I’m not talking about your typical thin origami paper. For articulating wings, we need something with a bit more substance and structure.
- Type of Cardboard: The best material is sturdy, yet foldable cardboard. Think cereal boxes, thin poster board, or even the cardboard backing from a notepad. Avoid corrugated cardboard if possible, as its ridges can make sharp folds difficult and add bulk where we don’t want it.
- Weight: You want a cardboard that holds its shape but isn’t so thick that it’s impossible to crease cleanly. If you can easily tear it with your hands, it might be too thin. If you need scissors and significant force to cut it, it might be too thick. Aim for something in the middle – like cardstock’s heavier cousins.
- Size: The size of your cardboard will dictate the size of your wings. For a good starting point, I recommend a piece that’s at least 12 inches by 12 inches (approximately 30cm x 30cm). This gives you enough space to work with and create substantial wings. You can always scale up or down once you get the hang of it.
- Single or Double-Sided: For this project, single-sided printed cardboard can be a wonderful choice. The plain side will be the inside of your wings, and the printed side will be the decorative exterior. However, plain, unprinted cardboard works beautifully too, offering a blank canvas for you to paint, draw, or collage onto. You can also use double-sided colored cardstock if you have it, but make sure it’s robust enough.
Mastering the Base Folds: The Foundation of Your Wings
Before we get into the sequence, let’s talk about making clean folds. This is crucial for making your wings articulate well and look polished.
- The Valley Fold: This is when you fold the paper towards you, creating a ‘V’ shape. Imagine you’re folding a letter to put in an envelope.
- The Mountain Fold: This is the opposite of a valley fold. You fold the paper away from you, creating an inverted ‘V’ or a peak.
Tips for Clean Folds:
To ensure your folds are sharp and precise:
- Use a Bone Folder or Ruler: If you have a bone folder, fantastic! If not, the edge of a ruler, a credit card, or even your fingernail can be used to firmly crease your folds. Run it along the fold line multiple times to really press it down.
- Align Edges and Corners Meticulously: Before you make any crease, take a moment to align your edges and corners perfectly. Even a tiny misalignment can throw off subsequent folds and the final look of your wings.
- Crease Firmly: Don’t be shy! Press down with conviction. A light crease won’t hold its shape, especially with slightly thicker cardboard.
The Fold Sequence: Step-by-Step Wing Creation
Let’s begin building our wings! We’ll be creating one wing at a time, and you can then repeat the process for the second wing.
1. Prepare Your Cardboard: Start with your chosen piece of cardboard. Lay it flat on your workspace with the side you want to be the outside of your wing facing upwards.
2. The Initial Diagonal Fold: Take the bottom-left corner of your cardboard and bring it precisely to meet the top-right corner. Your cardboard should now form a triangle. Crease this fold very firmly.
3. Unfold: Open the cardboard back up. You should now have a diagonal crease running across the entire piece.
4. The Second Diagonal Fold: Now, take the bottom-right corner and bring it to meet the top-left corner. This will create a second diagonal crease, forming an ‘X’ shape with the first crease. Crease this fold firmly.
5. Unfold Again: Open the cardboard back up. You should have two intersecting diagonal creases.
6. The Top Edge to Center Fold (First Side): Imagine a horizontal line running through the very center of your cardboard, intersecting the ‘X’. Take the entire top edge of your cardboard and fold it down so it meets this imaginary center line. Crease this fold firmly.
7. The Bottom Edge to Center Fold (First Side): Now, take the entire bottom edge of your cardboard and fold it up so it also meets that same imaginary center line. You should now have two parallel folds running horizontally, meeting in the middle, and the corners will be slightly bunched up at the sides. Crease these firmly.
8. Flip the Cardboard Over: Turn your entire piece of cardboard over so the side with the folds you just made is now facing down.
9. The Left Edge to Center Fold: Locate the left edge of your cardboard. Fold this entire left edge inwards so it meets the vertical center line of your cardboard (where the two diagonal creases met). Crease this fold firmly.
10. The Right Edge to Center Fold: Do the same for the right edge. Fold the entire right edge inwards so it meets the vertical center line. Crease this fold firmly. Your cardboard should now be a much narrower rectangle, with all four edges folded towards the center.
11. The Half Fold (Mountain Fold): Now, take your entire piece of cardboard and fold it in half vertically, away from you. This is a mountain fold. The folded edges you just created should now be on the outside. You should have a long, narrow shape. Crease this fold very firmly.
12. Prepare for Articulation: You’re almost there! Look at the folded edge you just created. This will be the base of your wing. On the open edge side, we’re going to make a couple of small accordion folds to create articulation.
13. The First Accordion Fold: Take the very tip of the open edge (the end opposite the firm folded edge). Make a small fold about 1/2 inch (1.5 cm) inwards, towards the folded edge. Crease this firmly.
14. The Second Accordion Fold: Now, fold that same section back outwards, away from you, aligning the new crease you just made with the initial fold. This creates a small zig-zag or accordion fold. Crease this firmly. You’ve just created your first articulation point!
15. Repeat Accordion Folds: Continue making these small accordion folds along the open edge of your wing, about every 1/2 inch (1.5 cm), alternating between folding inwards and outwards. Make sure each fold is firm. These folds will allow your wing to bend and extend.
16. Final Shaping: Once you’ve made accordion folds along the entire open edge, you can gently bend your wing. The accordion folds should allow it to fan out and contract. You can adjust the angle of these folds slightly to change how your wing moves.
Common Beginner Pitfalls and How to Avoid Them
It’s completely normal to encounter a few bumps along the road when you’re learning a new craft. Here are a couple of places where beginners often get stuck, and how to easily overcome them:
- Creases Aren’t Sharp Enough: As I mentioned earlier, this is probably the most common issue. If your folds aren’t creased firmly, the cardboard won’t hold its shape, and your wings might look floppy or won’t articulate as intended.
- Solution: Be patient and persistent with your creasing. Use a ruler or bone folder and run it over each fold multiple times. Press down with deliberate pressure. Don’t worry if it feels like you’re pressing hard; sturdy cardboard can take it!
- Mismatched Corners or Edges: When you’re making your initial diagonal folds, or folding the edges to the center, if your corners don’t meet perfectly or your edges aren’t aligned, the entire subsequent structure can become skewed.
- Solution: Take your time at the alignment stage. Before you commit to a crease, hold the two points or edges together and check for perfect alignment. It’s better to take an extra few seconds here than to have to redo a step later. Squint your eyes and look from different angles to ensure perfect symmetry.
- Accordion Folds Too Tight or Too Loose: The articulation points are what make these wings special. If your accordion folds are too close together, the wing might become stiff. If they’re too far apart, you won’t get good movement.
- Solution: Aim for consistent spacing. Use a ruler to mark your 1/2 inch (1.5 cm) increments if needed. Once you’ve made them, gently flex the wing. If it feels too stiff, you can try to slightly widen some of the folds. If it’s too floppy, try to make the existing folds a bit sharper or add an extra fold in between.
Variations: Make Your Wings Uniquely Yours!
The beauty of this DIY project is its adaptability! Here are some ways you can make your wings truly your own:
- Size: As mentioned, the size of your starting cardboard dictates the size of your wings. For smaller, delicate fairy wings, start with a smaller piece of cardstock. For dramatic, costume-worthy dragon wings, use a larger sheet of poster board.
- Paper Pattern and Color:
- Printed Cardboard: Cereal boxes, old packaging, or even decorative paper glued onto plain cardboard can add incredible patterns. Think of subtle textures or bold graphics!
- Plain Cardboard: This is your canvas. Paint your wings with metallic acrylics for a dragon’s hoard effect, add glitter for a magical touch, or draw intricate feather patterns with markers.
- Colored Cardstock: Using brightly colored cardstock can create vibrant, eye-catching wings. Consider gradients or ombre effects by layering different shades.
- Adding Details: Once your wings are folded, you can add extra flair. Cut small V-shapes out of the tips of the accordion folds to mimic feather tips, or glue on small beads or sequins for added sparkle.
Displaying and Gifting Your Articulating Wings
Finished wings are a fantastic statement piece! Here are some ideas for showcasing your handiwork:
- Costume Accessory: Attach them to a backpack, a corset, or a simple harness to create an instant fantasy costume for a party, Halloween, or cosplay event. The articulating folds allow for movement as you walk!
- Wall Art: Mount them on your wall! You can attach them directly with strong double-sided tape, or attach a wire loop to the back for hanging. They make for striking, dynamic decor.
- Puppet or Toy Enhancement: Glue them onto a stuffed animal, a doll, or even a simple cardboard puppet to give it an extraordinary upgrade.
- Gift Idea: These make thoughtful and unique handmade gifts for artists, crafters, or anyone who loves fantasy themes. Package them carefully, perhaps with a note explaining how they articulate!
I hope you’ve enjoyed this journey into creating articulating cardboard wings. Remember, practice makes perfect, so don’t be discouraged if your first pair isn’t exactly what you envisioned. The most important thing is to have fun and let your creativity soar! Happy folding!
Conclusion
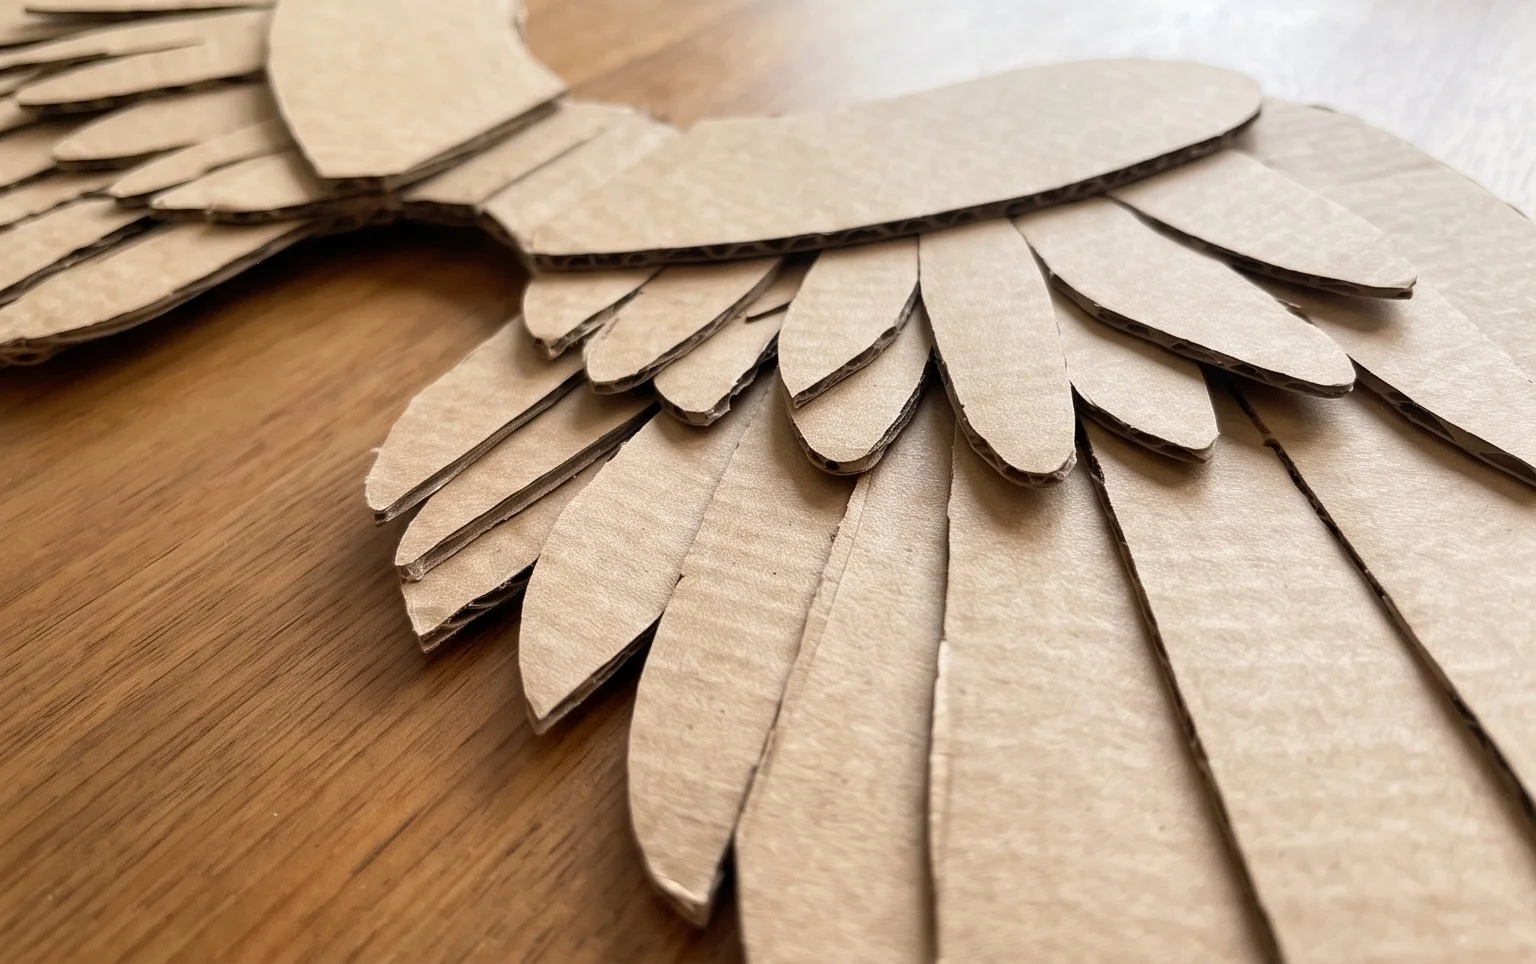
You’ve done it! Congratulations on creating your very own DIY cardboard articulating wings! Don’t worry if your first attempt isn’t perfect; every fold is a learning experience. The most important thing is to have fun with this creative process. We hope you feel a sense of accomplishment as you admire your unique creation.
Once you’ve mastered these cardboard articulating wings, why not try a few variations? You could experiment with different sizes, or perhaps even try adding some decorative paints or textures to make them truly your own. Remember to share your amazing finished models with friends and family – they’ll be as impressed as we are!
There are so many more exciting paper projects waiting to be discovered. Keep exploring, keep creating, and happy crafting!
