Easy Origami Jellyfish: Step-by-Step Paper Craft
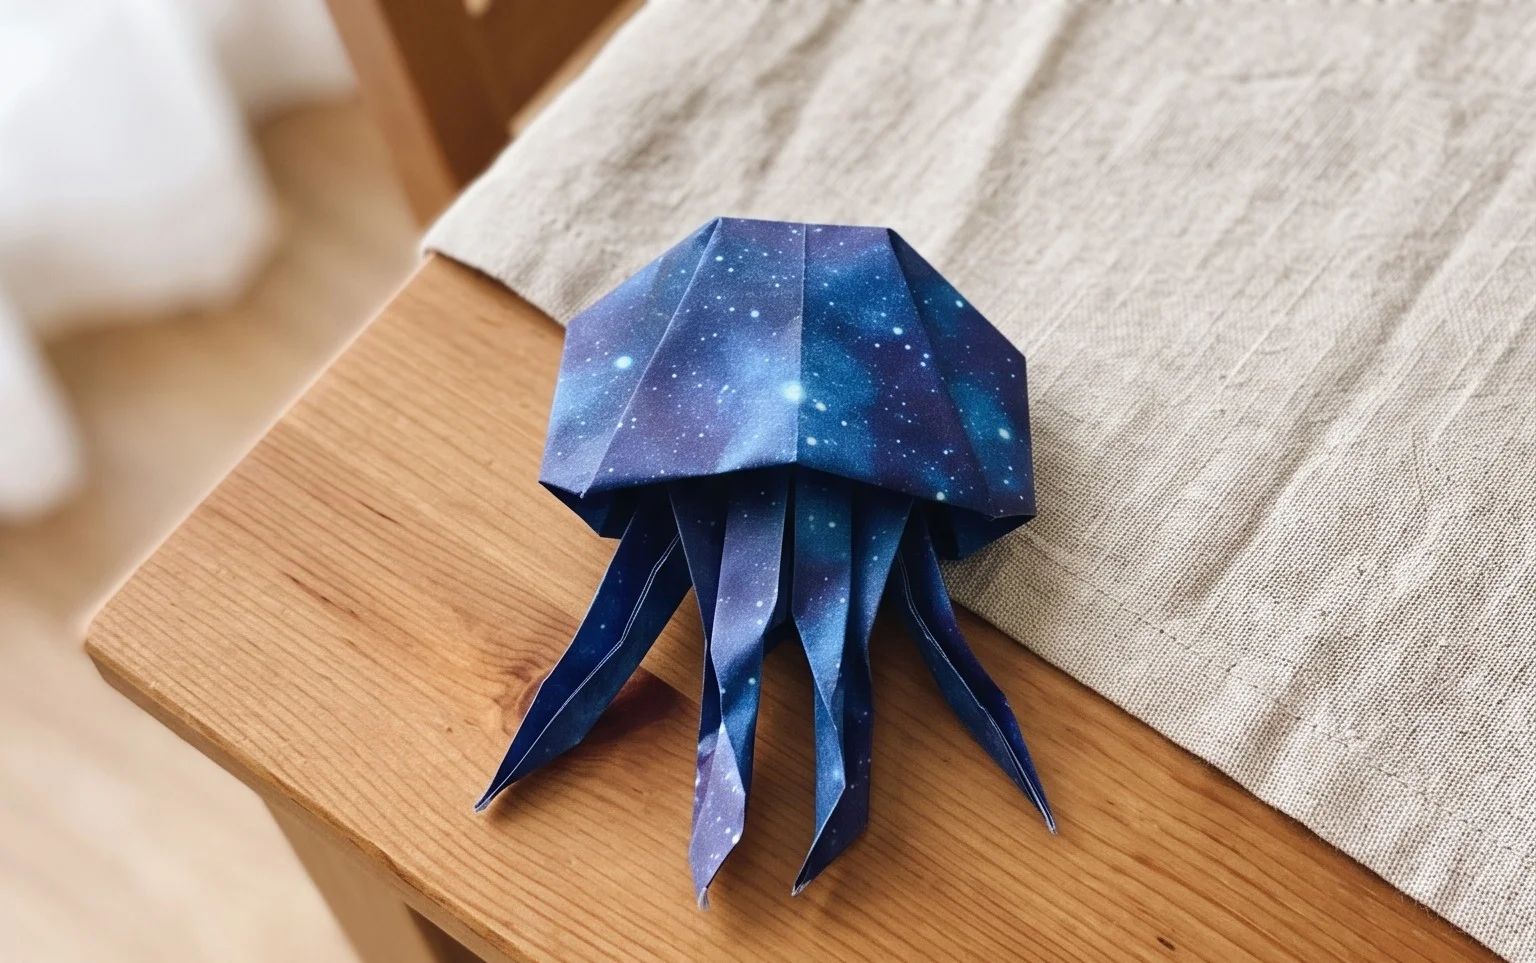
Origami Jellyfish are surprisingly simple and utterly charming! Imagine a delicate, translucent bell with graceful, flowing tentacles that seem to dance in the water – that’s exactly what we’ll be creating today. This project is perfect for complete beginners, a fun activity for kids, and makes for adorable decorations or unique handmade gifts. In about 15-20 minutes, you’ll master a few basic folds that come together to form this whimsical sea creature. You’ll learn how to transform a simple square of paper into a three-dimensional form, and discover the satisfying magic of origami that even the youngest crafters can enjoy. Let’s dive in and make some watery wonders!
Origami Jellyfish: A Step-by-Step Guide
Hello there! I’m so excited to guide you through making your very own origami jellyfish. This is a wonderfully whimsical model, and I think you’ll find it quite satisfying to create. We’ll go through everything step-by-step, from choosing the right paper to adding the final touches. Don’t worry if you’re new to origami; I’ll explain each fold as clearly as possible. My goal is to help you create a beautiful jellyfish that you can be proud of.
Choosing Your Paper
The paper you choose can really make your jellyfish special! For this model, I highly recommend using standard origami paper. This paper is specifically designed for folding: it’s thin enough to allow for multiple layers without becoming too bulky, yet strong enough to hold a crease well.
* **Type:** Origami paper is ideal. If you don’t have origami paper, any thin, crisp paper will work. Printer paper can be a bit too thick and stiff for the finer folds, but it’s a good option if it’s all you have. Washi paper, which is often handmade and textured, can give a beautiful, organic feel to your jellyfish.
* **Weight:** Standard origami paper is usually around 70-80 gsm (grams per square meter). This weight is perfect because it’s manageable for beginners and allows for clean folds.
* **Size:** For your first jellyfish, I suggest starting with a square piece of paper that’s at least 6 inches (15 cm) on each side. Larger paper is generally easier for beginners as it gives you more room to maneuver. Once you’re comfortable, you can experiment with smaller sizes, like 3 or 4 inches (7.5 or 10 cm).
* **Single or Double-Sided:** You can use either! If you use single-sided paper, the color will be on one side and white on the other. This can create a lovely effect where the inner parts of your jellyfish have a different hue. Double-sided paper, where both sides are colored, will give you a uniformly colored jellyfish, which can also be very striking. Consider how you want your finished jellyfish to look when making your choice.
The Base Folds: Building Your Foundation
Before we start folding our jellyfish, we need to create a solid base. This involves a couple of essential folds that are common in many origami models. Making these folds accurately and crisply will make the rest of the process much smoother.
The primary base we’ll use is a variation of the waterbomb base, which will naturally give our jellyfish a rounded, bulbous head.
* **Valley Fold in Half:** Start with your paper flat on a table. If your paper is colored on one side, place the colored side facing down. Bring the bottom edge up to meet the top edge precisely. Run your finger firmly along the folded edge to create a sharp crease. You should now have a rectangle.
* **Valley Fold in Half Again (Perpendicular):** Now, take the rectangle you just made. Bring the left edge over to meet the right edge. Again, crease firmly. You should now have a smaller square, with four layers of paper. Unfold this last fold. You should see a crease running vertically down the center of your rectangle.
* **Valley Fold Diagonally:** Take the rectangle and bring the bottom-left corner up to meet the top-right corner. Align the corners perfectly and crease along the diagonal edge. Unfold this.
* **Valley Fold Diagonally (Other Way):** Now, take the bottom-right corner and bring it up to meet the top-left corner. Align the corners and crease firmly. Unfold this. You should now have your original large rectangle with creases forming an ‘X’ shape.
Now, we need to transform this into our preliminary base.
* **Collapse into a Square Base:** With your paper still lying flat, colored side down, and all your creases made, gently push the left and right sides inwards along the vertical crease. As you do this, the top edge will naturally come down to meet the bottom edge. The diagonal creases will help guide the paper. You are essentially flattening the rectangle into a square shape. The two triangular flaps will come together at the top. Make sure the open edges of the paper are all at the bottom. This is your preliminary square base.
The Fold Sequence: Bringing Your Jellyfish to Life
Let’s get folding! I’ll guide you through each step. Remember to crease firmly after each fold for the best results.
1. **Prepare the Base:** Place your preliminary square base on the table in front of you with the closed point (where all the corners meet) facing upwards, and the open edges facing towards you.
2. **Fold the Flaps Up:** Take the top layer of the right flap and bring its bottom edge up to meet the center vertical crease. Crease this fold firmly. Repeat this with the top layer of the left flap, bringing its bottom edge up to meet the center vertical crease. You should now have a kite shape on top.
3. **Fold the Top Point Down:** Take the very top triangular point (where all the flaps meet) and fold it down. The tip of this triangle should meet the point where the two flaps you just folded in meet the horizontal edge formed by the tops of those flaps. Crease this fold well.
4. **Unfold the Previous Folds:** Now, unfold the two side flaps you folded to the center in step 2, and also unfold the top point you folded down in step 3. You should return to your square base, but with new creases on the top layer.
5. **Petal Fold:** This is the most crucial fold. With the open edges still facing you, take the top layer of the right side. Lift the bottom point of this top layer upwards. As you lift it, use the creases you just made in steps 2 and 3 to guide the paper. The sides of this flap should fold inwards along those creases, and the tip should meet the top point. The whole flap will rise up and flatten into a diamond shape. This is called a petal fold. You are essentially opening up the flap and squashing it flat. Make sure the edges are aligned neatly.
6. **Repeat Petal Fold on the Left:** Repeat step 5 on the top layer of the left side. Lift the bottom point of the left flap upwards, using the creases to guide the sides inwards and flatten it into a diamond shape. You should now have two diamond shapes on the top layer.
7. **Flip and Repeat:** Flip the entire model over. You’ll see a plain square on this side. Repeat steps 2 through 6 on this side. This means folding the bottom edges to the center, folding the top point down, unfolding those folds, and then performing the two petal folds. When you’re done, both sides of your model should look like they have two diamond shapes.
8. **Narrow the Base:** Now, with the open edges still facing you, take the top layer of the right flap and fold its outer edge to meet the center vertical crease. Crease firmly. Repeat with the top layer of the left flap, folding its outer edge to the center crease. You should now have a narrower kite shape on the top layer.
9. **Flip and Repeat Narrowing:** Flip the model over and repeat step 8 on this side. Fold the outer edges of the top layer to the center vertical crease on both the right and left sides.
10. **Prepare the Tentacles:** You should now have a shape that looks like a narrow diamond with two flaps on each side. On the top layer, take the right flap and fold its outer edge to the center crease once more. Crease well. Repeat with the top layer left flap, folding its outer edge to the center crease.
11. **Flip and Repeat Tentacle Folds:** Flip the model over and repeat step 10 on this side. Fold the outer edges of the top layer to the center crease on both the right and left sides. You should now have a very narrow, elongated diamond shape.
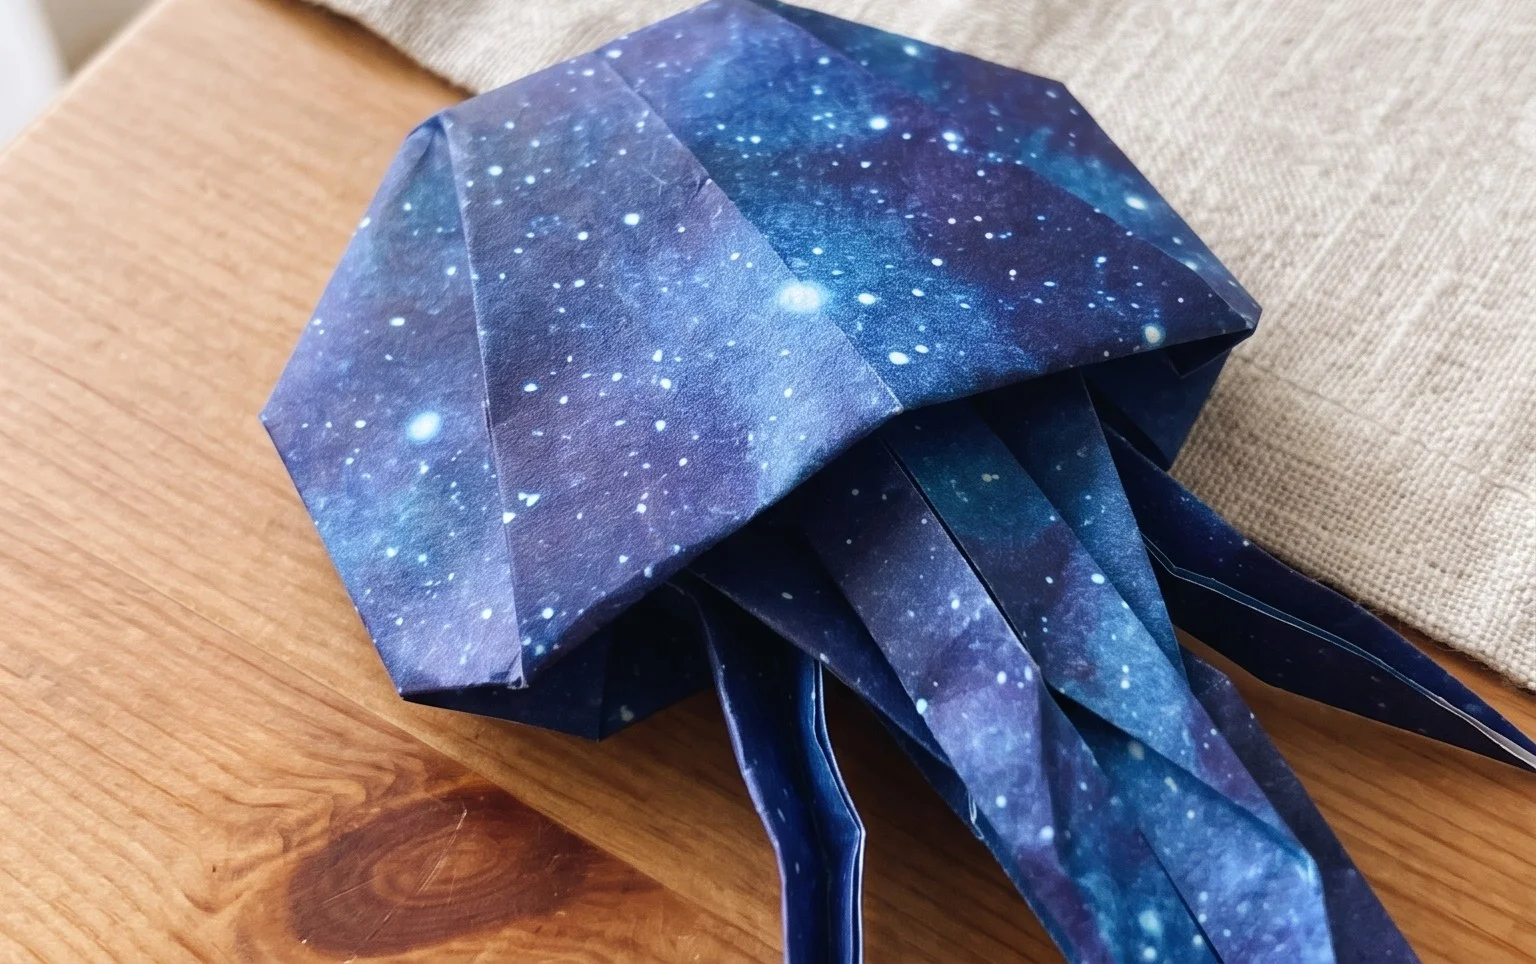
12. **Form the Head:** Hold the model with the open ends pointing downwards. Take the top point (the closed tip of the diamond) and gently pull it upwards and outwards. As you do this, the sides of the model will naturally start to open up, forming the rounded head of the jellyfish. You can gently shape this into a bulbous form.
13. **Create the Tentacles:** At the bottom of your model, you’ll see four points. These will become your jellyfish tentacles. Gently pull these points downwards and slightly apart. You can crease them at the top to give them some definition, or leave them soft and flowing. You can also curl them slightly by running them between your finger and thumb.
14. **Finishing Touches:** You can gently puff out the head of the jellyfish to give it more volume. If you want the tentacles to spread out more, you can make small accordion folds along their length.
Common Pitfalls and How to Avoid Them
Even with clear instructions, sometimes things don’t go exactly as planned. Here are a few places beginners often get stuck, and how to navigate them:
* **Messy Petal Folds (Step 5 & 6):** The petal fold is probably the trickiest part. The key is to rely on your creases from the previous steps. Before you start the petal fold, make sure those initial folds (bringing flaps to the center, folding the top point down, and then unfolding them) are sharp and accurate. When you begin the petal fold, lift the point gently and let the existing creases do the work of collapsing the sides inwards. Don’t force the paper; try to guide it. It might take a couple of tries to get the hang of how the paper wants to move. If it looks a bit messy, don’t worry! A little imperfection adds character.
* **Uneven Tentacles (Step 13):** If your tentacles are uneven, it often comes back to the folds leading up to them. Ensure that in steps 8, 9, 10, and 11, you are folding the edges precisely to the center crease. When you get to pulling the tentacles down, try to make sure you’re pulling them with equal force and at a similar angle. If one looks much shorter or longer than the others, you can try to gently stretch it out or make a small fold to adjust its length.
* **Bulky Folds:** If your paper feels too thick and your folds aren’t crisp, it’s usually a sign that you’re not creasing firmly enough, or your paper might be too thick for the model. Go back over your creases and press down firmly with your fingernail or a bone folder if you have one. Also, ensure you’re folding precisely – even a millimeter off can cause bulkiness in later steps. If you’re using thicker paper, consider going up a paper size for your next attempt.
Variations to Spark Your Creativity
Once you’ve mastered the basic origami jellyfish, you can have a lot of fun experimenting with variations!
* **Size:** As I mentioned, changing the size of your starting square is the easiest way to change the size of your jellyfish. Smaller ones can be made in batches, and larger ones make a more dramatic statement.
* **Paper Pattern:** This is where things get really exciting! Try using patterned origami paper. Papers with swirls, dots, or even a subtle gradient can create stunning effects. Imagine a jellyfish with a starry night pattern or a beach-themed print!
* **Color:** Don’t be afraid to mix and match. Use paper that’s different colors on each side for a two-toned effect. You could also paint or draw on your paper before folding, though be careful not to use too much paint, as it can affect the paper’s ability to crease.
* **Adding Details:** You could try gently curling the tentacles with a pencil or a skewer to give them more of a wavy, underwater look.
Displaying and Gifting Your Jellyfish
Your finished origami jellyfish are delightful little creations, perfect for all sorts of uses!
* **Decoration:** String them together with invisible thread to create a beautiful mobile. Hang them from branches, mobile arms, or even a lampshade for a whimsical ocean-themed decoration. They look fantastic clustered together on a shelf or windowsill.
* **Gifts:** Origami jellyfish make wonderful, unique gifts. Pop one into a card, attach it to a present, or give a whole collection as a thoughtful present for a friend who loves the ocean or origami.
* **Party Favors:** If you’re hosting an under-the-sea themed party, origami jellyfish are perfect as charming party favors.
* **Educational Tool:** They’re also a great way to introduce children to origami and marine life.
I hope you’ve enjoyed making your origami jellyfish! Remember, practice makes perfect, so don’t be discouraged if your first one isn’t flawless. The joy is in the process of creating something beautiful with your own hands. Happy folding!
Conclusion
Congratulations on creating your very own origami jellyfish! We hope you enjoyed following along with these step-by-step instructions. Remember, your first attempt is always a learning experience, so don’t be discouraged if it’s not perfect. The joy of origami is in the process!
Once you’ve mastered this delightful jellyfish, we encourage you to share your creation with friends and family. For your next adventure, try a slightly larger sheet of paper for a more dramatic jellyfish, or experiment with different colored papers to make a whole school!
Don’t stop here – there are countless more wonderful paper projects waiting for you to explore. Keep folding and let your creativity flow!