Easy Paper Umbrella Origami: Step-by-Step Craft
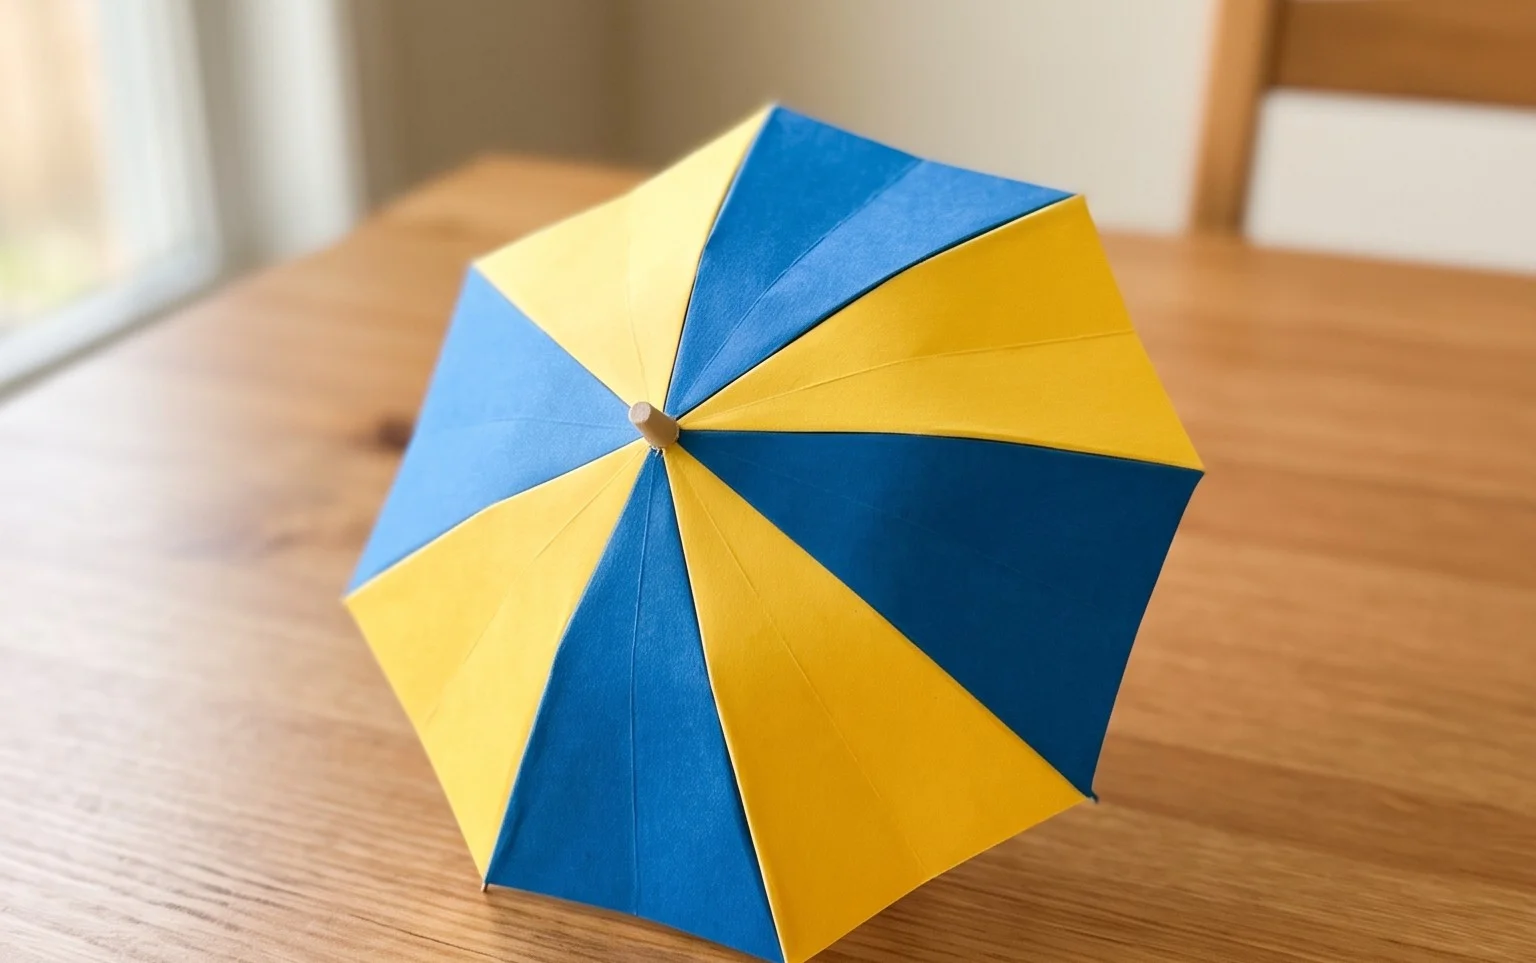
How to Make Paper Umbrellas – Easy Peasy and Fun! Get ready to add a splash of color and charm to your world with these delightful little paper umbrellas. Imagine tiny, perfectly formed parasols, ready to shield a miniature world from imaginary rain, or simply to bring a smile with their cheerful design. They’re perfect for complete beginners, a fantastic activity for kids, and make adorable handmade gifts or decorations for parties and crafts.
In just about 5-10 minutes per umbrella, you’ll learn simple folding techniques that are surprisingly satisfying. We’ll guide you step-by-step through creating the canopy and the little handle, transforming a simple square of paper into something truly special. So grab your favorite paper, get your fingers ready, and let’s make some magic!
How to Make Paper Umbrellas – Easy Peasy and Fun!
Hello there, crafty friends! Today, we’re going to embark on a delightful origami adventure and learn how to fold your very own paper umbrellas. These little beauties are surprisingly easy to make, and they add such a charming touch to decorations, gifts, or even just a quiet afternoon of crafting. Don’t worry if you’ve never folded origami before; I’ll walk you through every step in plain language, as if we were sitting side-by-side. Get ready to have some fun!
Choosing Your Paper: The Foundation of a Fabulous Umbrella
The first step in creating any origami model is selecting the right paper. For our paper umbrellas, you have a bit of flexibility, but a few types will give you the best results.
- Type of Paper: Standard origami paper is ideal. It’s designed to hold creases well and is often thin enough for multiple folds without becoming too bulky. If you don’t have dedicated origami paper, plain copy paper (around 80gsm) works too, though it might be a little stiffer. Cardstock is generally too thick for this model.
- Weight: As mentioned, thinner is better. Standard origami paper is typically around 60-80gsm.
- Size: For a good-sized umbrella, I recommend starting with square pieces of paper that are 6 inches (about 15cm) on each side. This size is easy to handle and produces a nicely proportioned umbrella. You can certainly experiment with smaller or larger squares once you’ve mastered the basic fold.
- Single or Double-Sided: This is where you can get creative! Single-sided origami paper, which has a coloured side and a white side, will give you an umbrella with a coloured top and a white inside. This is a classic look. If you want a fully coloured umbrella, use double-sided coloured paper. For a fun twist, try patterned paper – just be mindful of the scale of the pattern relative to your paper size.
The Base Folds: Mastering the Essentials
Before we dive into the umbrella itself, let’s get comfortable with a couple of fundamental origami folds. These are the building blocks of many origami models, and understanding them will make this umbrella a breeze.
The first base fold we’ll use is the **Valley Fold**. Imagine a mountain range. A valley fold is like the valley – the crease goes inwards, forming a “V” shape when viewed from the side. You achieve this by bringing two edges or corners together and creasing firmly along the line where they meet.
The second base fold is the **Mountain Fold**. This is the opposite of a valley fold. The crease goes outwards, forming an inverted “V” or a tent shape when viewed from the side. To make a mountain fold, you typically make a valley fold first and then unfold it, flipping the paper over and creasing along the existing line in the opposite direction. For this umbrella, we’ll mostly be working with valley folds.
When I say “crease firmly,” I mean using your fingernail or a bone folder (if you have one) to press down along the folded edge. A sharp crease makes for a neater and more precise final model.
Your Origami Umbrella: A Step-by-Step Journey
Alright, let’s get folding! Grab your square piece of paper. We’re going to start with the coloured side facing up, if you’re using single-sided paper.
- **First Fold (Diagonal):** Take your square paper and bring the bottom left corner up to meet the top right corner. Make a sharp crease along the diagonal line. Now, unfold the paper. You should have a crease running diagonally from one corner to the opposite.
- **Second Fold (Other Diagonal):** Now, bring the bottom right corner up to meet the top left corner. Crease firmly along this diagonal line. Unfold the paper. You should now have two diagonal creases forming an “X” on your paper.
- **Third Fold (Hamburger Fold):** Flip your paper over so the white side is facing up (if using single-sided paper). Bring the bottom edge up to meet the top edge. Crease firmly along the horizontal line. Unfold the paper.
- **Fourth Fold (Hot Dog Fold):** Bring the left edge over to meet the right edge. Crease firmly along the vertical line. Unfold the paper. You should now have an “X” of creases on one side and a “+” of creases on the other.
- **Forming the Water Bomb Base:** This might seem a little tricky, but it’s quite magical! With the white side still facing up, gently push the left and right edges of the paper inwards towards the centre. As you do this, the top edge should naturally start to come down. The existing diagonal creases will help guide the paper. Your goal is to collapse the paper into a smaller, layered square. You want the two open flaps of paper to meet at the bottom point. Press down to flatten the whole thing. This is called a “Water Bomb Base.” You should have a square with four flaps, two on each side, all meeting at the bottom point.
- **Opening the Flaps (First Side):** With the closed point of the water bomb base facing away from you (the open edges should be towards you), take the top layer of the right flap and fold its bottom edge to meet the centre vertical crease. Crease firmly.
- **Repeat on the Left (First Side):** Now, take the top layer of the left flap and fold its bottom edge to meet the centre vertical crease. Crease firmly. You should now have a kite shape on the top layer.
- **Folding Down the Top Triangle:** You’ll see a small triangle at the top of the kite shape you just made. Fold this triangle downwards, creasing it along the top edge of the two flaps you just folded in.
- **Unfold the Kite:** Carefully unfold the two side flaps you just folded in (steps 6 and 7), and also unfold the small top triangle (step 8). You’ll see the creases you just made.
- **The Petal Fold (First Side):** This is where the magic happens! Lift the bottom point of the top layer of paper upwards. Use the creases you made in steps 6, 7, and 8 to guide the paper. As you lift the bottom point, the sides should naturally start to fold inwards along those creases. Your goal is to bring the bottom point all the way up to the top point, flattening the paper into a long, diamond shape with two layers. This is called a “Petal Fold.”
- **Repeat on the Other Side:** Flip the entire model over. You should see a flat diamond shape. Repeat steps 6 through 10 on this side. Fold the right flap to the centre, fold the left flap to the centre, fold down the top triangle, unfold those three creases, and then perform the petal fold by lifting the bottom point up to the top.
- **Narrowing the Umbrella:** You should now have a long diamond shape with two “legs” or points at the bottom. Take the right “leg” and fold it inwards to meet the centre vertical crease. Crease firmly.
- **Repeat on the Left:** Take the left “leg” and fold it inwards to meet the centre vertical crease. Crease firmly. You should now have a long, slender diamond shape with no legs at the bottom.
- **Flip and Repeat:** Flip the entire model over. Repeat steps 12 and 13 on this side – folding the right leg to the centre and then the left leg to the centre. You’ll end up with another long, slender diamond shape.
- **Creating the Umbrella Shape:** You should now have a shape that looks like a very narrow diamond, with two layers on each side. Hold the model so that the open edges are at the top. Take the top layer of the right side and fold it outwards and slightly upwards, so that the edge of this flap aligns with the outer edge of the entire model. Crease firmly.
- **Repeat on the Left:** Do the same on the left side. Fold the top layer of the left side outwards and slightly upwards, aligning its edge with the outer edge of the model. Crease firmly.
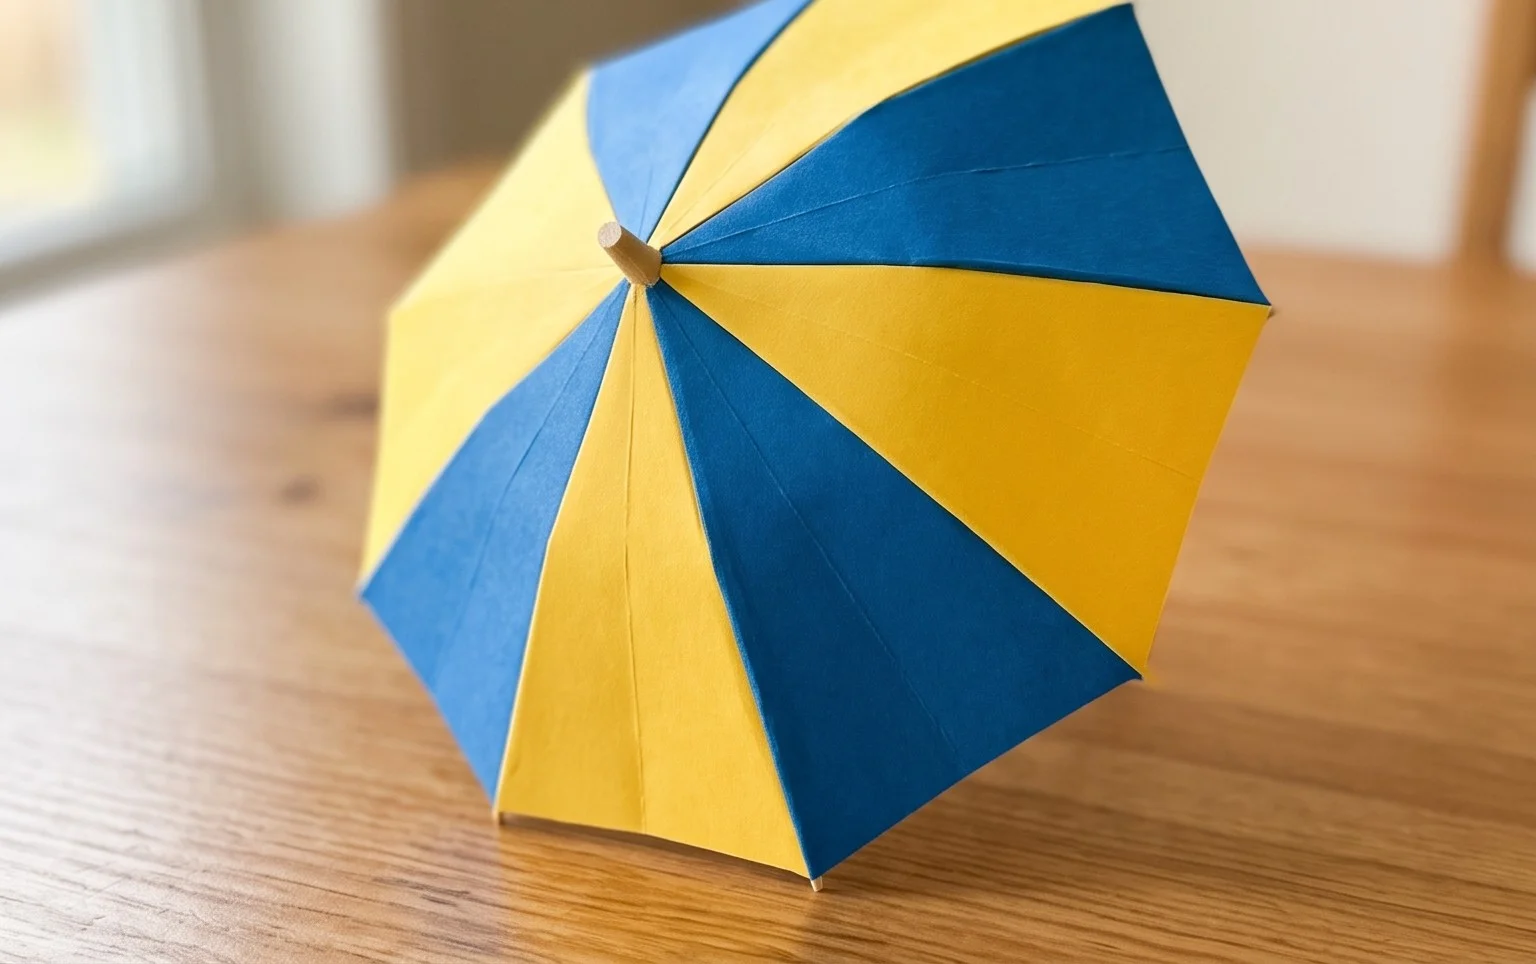
- **The Final Touch:** Flip the model over. Repeat steps 15 and 16 on this side. You should now see your umbrella shape emerge! The flaps you just folded outwards form the canopy of the umbrella. You can gently open them a little bit to give it a more rounded appearance.
Common Pitfalls and How to Avoid Them
Even with the clearest instructions, there are a couple of places beginners often stumble. Let’s address them so you can have a smooth folding experience.
- Not Creasing Firmly Enough: This is probably the most common issue. If your creases aren’t sharp, the paper won’t hold its shape properly, especially during the water bomb base and petal fold. Always take the time to really press down on your folds with your fingernail or a tool. It makes a world of difference!
- Getting Lost in the Water Bomb Base Collapse: Step 5, forming the water bomb base, can feel a bit confusing at first. The key is to trust the creases you made earlier. Gently encourage the sides to come inwards while the top naturally falls. Don’t force it; let the creases guide you. If it’s not collapsing smoothly, check that your initial diagonal and horizontal/vertical folds were accurate and that you’re pushing the correct edges inwards.
- Messy Petal Folds: The petal fold (step 10 and its repeat) is where the umbrella starts to take its elegant shape. If your petal folds are uneven or don’t come to a sharp point at the top, it’s usually because the previous folds (steps 6-8) weren’t precise enough, or you didn’t unfold them fully before starting the petal fold. Ensure those initial kite-like folds are neat and meet the centre crease accurately.
Varying Your Umbrellas: Endless Possibilities!
Once you’ve mastered the basic umbrella, the fun truly begins as you explore variations!
- Size: As I mentioned, start with 6-inch squares. But don’t stop there! Try smaller squares (3-inch for tiny decorative accents) or larger ones (8-10 inches for more substantial creations). Just remember that the scale of your paper will influence the final size of your umbrella.
- Paper Patterns: This is where you can really let your creativity shine! Use patterned origami paper for a vibrant umbrella. Consider floral patterns for a garden theme, geometric designs for a modern look, or even sheet music for a whimsical touch. Just be sure the pattern isn’t too busy or too large for the size of your paper.
- Colour: Beyond single and double-sided paper, experiment with different solid colours. Think about colour combinations – a blue canopy with a white tip, or a cheerful yellow with a pink centre. You can even use coloured cardstock for the handle if you decide to add one (more on that later).
Displaying and Gifting Your Creations
Your handmade paper umbrellas are too lovely to keep hidden away! Here are some ideas for showcasing and sharing your folded treasures:
- Party Decorations: String them together to create a beautiful garland for a birthday party, baby shower, or tea party. Hang them individually from the ceiling for a whimsical effect. They make fantastic table decorations too, placed in small vases or scattered amongst other party favours.
- Gift Toppers: Attach a single umbrella to a gift box for a unique and memorable touch. It’s a charming alternative to a traditional bow.
- Scrapbooking and Card Making: These little umbrellas are perfect embellishments for handmade cards and scrapbook pages. They add a pop of colour and dimension.
- Dollhouse Accessories: If you or someone you know enjoys dollhouses, these miniature umbrellas are the perfect addition to a miniature scene.
- Mobiles: Create a larger mobile by hanging several umbrellas of different sizes and colours from a hoop or branch.
- With a Handle: For a more complete look, you can add a simple handle. Cut a thin strip of paper (or use a paper straw, toothpick, or skewer) and glue it into the opening at the bottom of the umbrella. You might need to fold the bottom edges slightly inwards to create a secure attachment point for the handle.
Making paper umbrellas is a wonderfully rewarding craft. It’s a chance to slow down, focus on the tactile experience of folding paper, and create something truly beautiful. Don’t get discouraged if your first few attempts aren’t perfect; every fold is a learning experience. Enjoy the process, and happy folding!
Conclusion
Congratulations on completing your very own paper umbrella! We hope you found this tutorial easy peasy and fun. Don’t worry if your first attempt isn’t perfect; every fold is a learning experience, and practice makes masterpieces! We encourage you to try making a few more and perhaps even share your charming creations with friends and family. For your next origami adventure, consider trying a miniature umbrella or perhaps a larger, more decorative one. The possibilities are endless! We invite you to explore our other paper projects for even more creative fun.